
Sit back, enjoy, and feel free to ask questions!
Bring the sparge water up to temp. This is brewed in a 20g tank/pot with a 5500w element that is connected to a 240v line. It is incredibly fast at bringing 20g of water up to temp in no time flat (typically <1 hour).

Here you can see the self installed 5500w element and the whirlpool arm in the sparge tank, which also doubles as my boil kettle. The upgrade to an electric element from gas is a must if you're using propane. I use my home's electric breaker which is located in my garage to turn the element on and off. Total cost for the upgrade was around $60 (if you have all the tools you need), which is easily offset by all the propane that is saved. A 240 line is recommended, though not a must. Visit this link for instructions on how to add an element to any brew kettle!

I don't have a pH reader, so I do the easy thing. I add 5.2 to my sparge water. I have excellent tasting well water, and the 5.2 get's the water to the ideal level for sparging. For those of you on city water, there are additional additives you'll need to add to your water to remove nasties like chlorine and fluoride, or you can do the easy thing and just grab a few gallons of spring water or distilled water.


Hob Knob! Represent!

Weighing the specialty grains. This is 1# of C60 getting set to go into the barley crusher.

We used US 2 row & Marris Otter as our base grains.
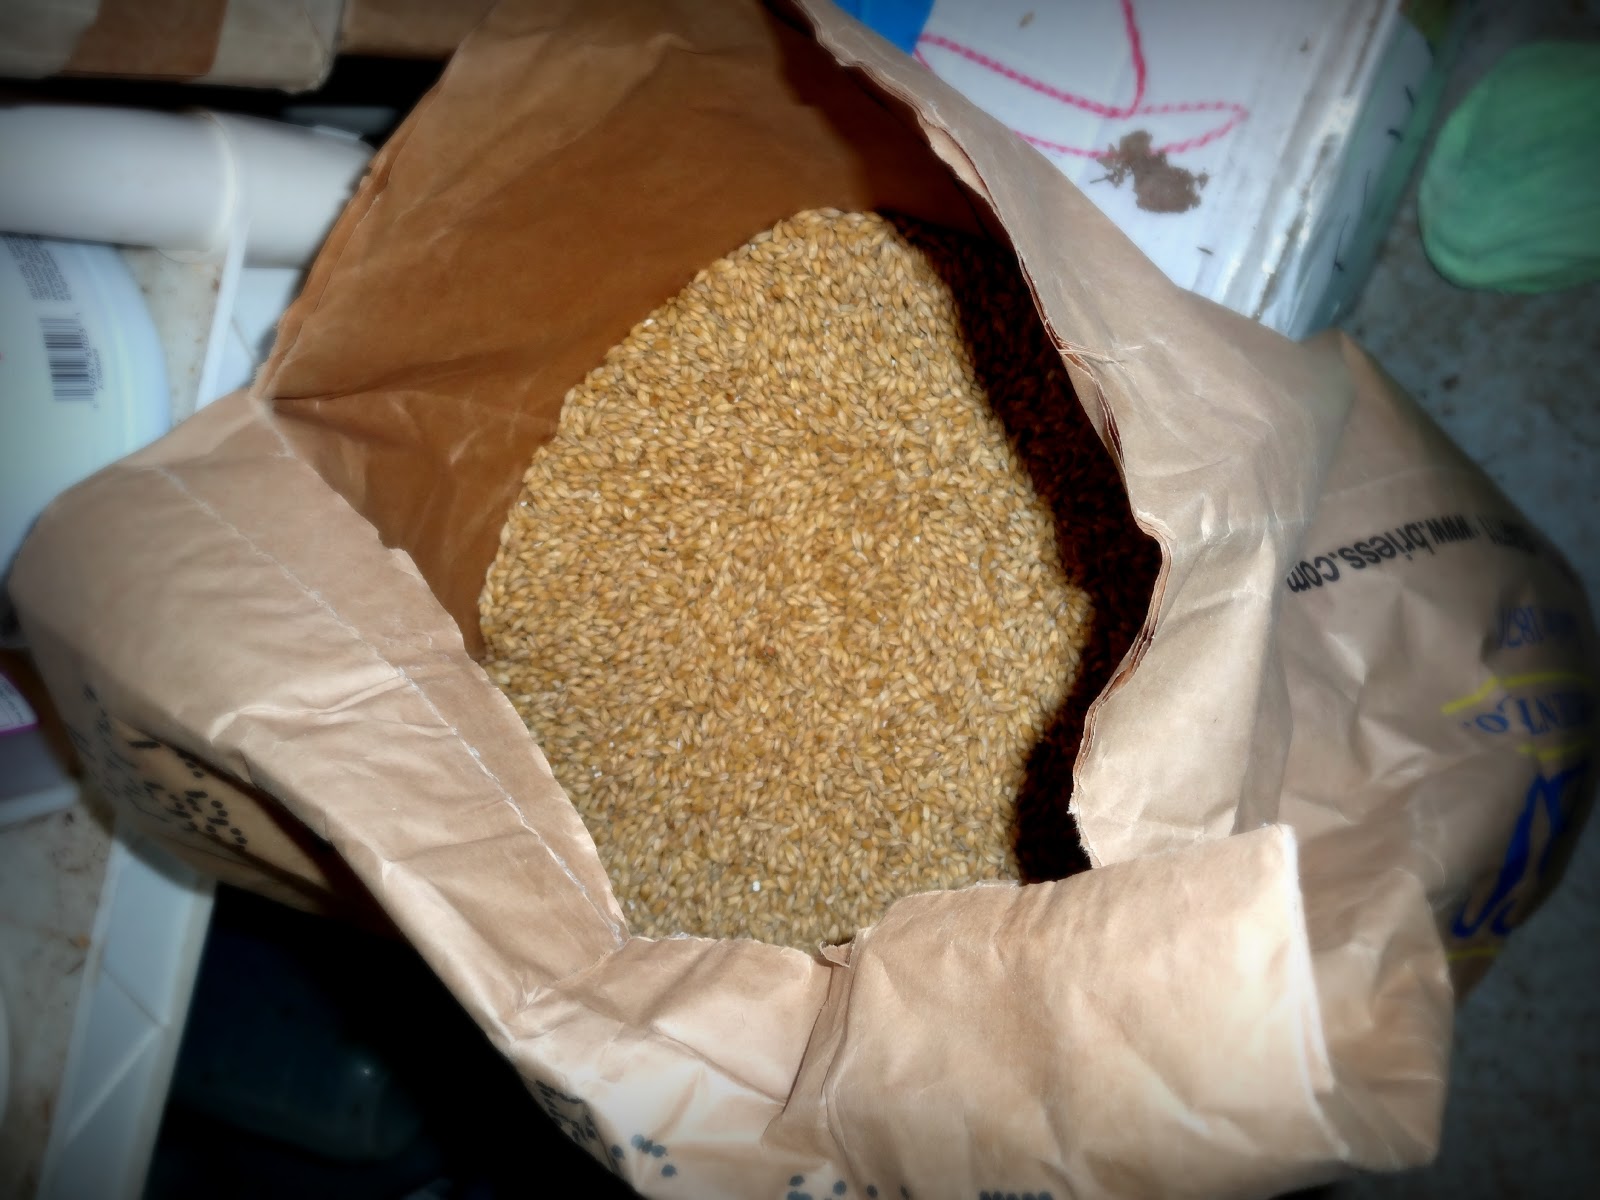
In go about 16# of base grains!


Almost perfectly at 158.2...must be time to sparge! I used the batch sparging for this mash, and finished up with a fly sparge at 168 degrees to get me to my 12.74g of preboil volume. The grain bill was 12lbs of marris otter, 4lbs of 2 row, 1 lb c60, 1lb c120, 8oz pale choc., 4oz black patent malt. The hops used were 2oz of East Kent Goldings.


Mash In!

Checking our mash temp. 148 on the dot!


Remember, the key is to gently pour the wort back over the top so you don't disturb the grain bed!

After 75 minutes, we begin draining the mash tun, and fly sparging the grains. Batch sparging is essentially covering the grains with water, and soaking them for a period of time. Fly sparging involves a continuous flow of water through the grains.

A march 809 pump powers the fly sparging water up to the top of the mash tun where it trickles over the grains. Temperatures are about 170 degrees, as we're doing a mash out to stop the enzyme action. It's important to not exceed 172 degrees with your fly sparging water, as this could lead to the release of tannins, which could result in unfavorable taste attributes in your final beer.

Ahhhhh. Soon to be a beautifully colored mild brown ale! Can't wait!

With the 5500w heating element on a 50 amp line, it takes no time at all to reach a strong rolling boiling.

One thing you'll notice about the boil is a lack of any type of head. The reason for this is the grain bill that was used is very low in proteins. Proteins actually are the primary contributors of 'mouth feel' in a beer. With the low ABV% expected from this particular brew, and the lack of any real head during the boil, I expect and easy drinking, light, session brew from this mild brown ale. There was a single 2oz hop addition of East Kent Goldings at 60 minutes.

One of the good things about being on a well system is a virtually unlimited supply of cool water. After the boil is complete, we hook up a plate chiller to the March 809, and recirculate for about 30 minutes. The ample water flow and plate chiller bring down the temperature of our wort from 212 to 68 degrees extremely quickly.

With our wort now at 68 degrees, it's time to transfer to the carboy and pitch our yeast. I use a funnel that has a small filtration screen in it as well as the thin mesh filtration screen that goes over the funnel. The hops still manage to clog both on a routine basis, so keeping a sanitized spoon handy to keep the wort flowing is essential. I sanitize everything with star san. Don't fear the foam. It's ok to leave it on your vessles and utensils. The foam actually breaks down to a yeast nutrient. :)

Overhead shot of adding the wort to my fermentation vessel (a 6.5g glass carboy).

Fermentation Underway! Fermentation is the single most important step in the brewing process. Happy yeast, make happy beer. Depending on your strain, you typically don't want to exceed 68 degrees to keep the yeast in an environment they can thrive in. You should also familiarize yourself with the different stages of fermentation. Just because you're bubbler isn't bubbling away doesn't mean the fermentation is done. The yeast need some added time to clean up after themselves and remove some off flavors.


The Hob Knob keg, representin!

Prost! The final product! Man...that's makin me thirsty. Enjoy :)

Hope this article helps everyone gain a better understanding of the all grain brew process. Feel free to post comments or questions below, and I'm happy to help. Until next time!
Prost!
~Jeff